


The Premise of Rancid Badges Introduction to the Main Character In the gripping narrative of Rancid Badges, readers are introduced to Derrick Nash, an Atlanta beat cop whose moral compass and dedicati
Understanding On-Site Videography
What Is On-Site Videography?
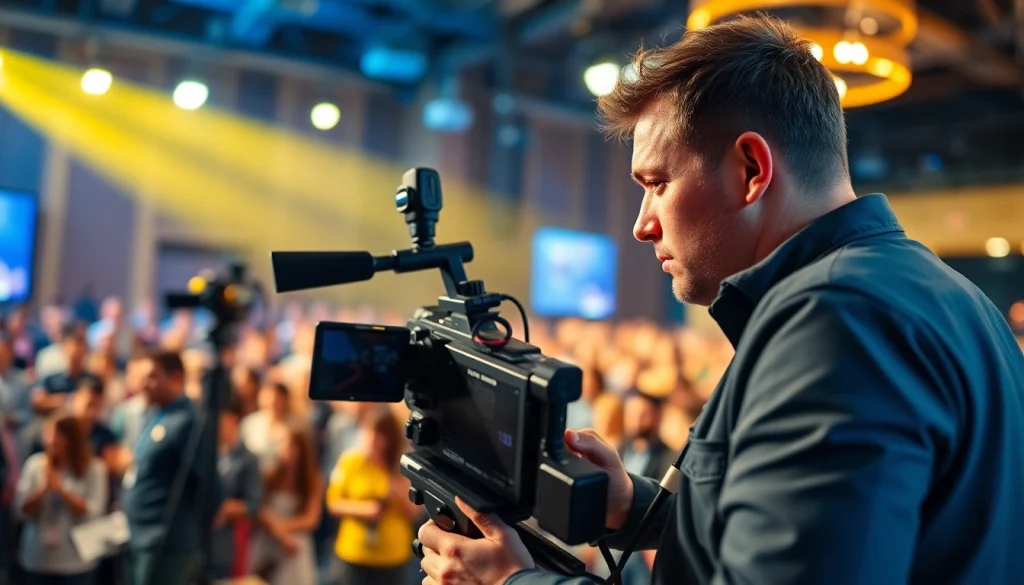
On-site videography is a specialized form of video production where footage is captured in real-time during an event or at a specific location relevant to the subject matter, rather than in a studio setting. This approach enables videographers to document authentic moments, interactions, and environments, making the resulting videos more relatable and engaging for the audience. On-site videography can encompass a wide range of events, including corporate functions, weddings, product launches, interviews, and more, offering a dynamic alternative to traditional videography methods.
Benefits of On-Site Videography
The advantages of on-site videography are multifaceted and can significantly enhance the quality and impact of video projects:
- Authenticity: Capturing footage in real-time allows for a genuine portrayal of events, showcasing true emotions and interactions that may be lost in a rehearsed studio setting.
- Versatility: On-site videography can adapt to various contexts, enabling recordings in diverse environments such as offices, outdoor venues, and public spaces.
- Cost-Effectiveness: By using available locations, clients can save on costs associated with hiring studio spaces, while still achieving high-quality video output.
- Immediate Engagement: In events like conferences or trade shows, on-site videography can capture audience reactions and testimonials instantly, often leading to immediate social media sharing and increased viewer engagement.
Common Uses for On-Site Videography
On-site videography is employed in a wide array of applications, each designed to serve specific purposes:
- Corporate Events: Companies often utilize on-site videography to document annual meetings, product launches, and other significant gatherings to enhance their marketing and internal communication efforts.
- Interviews and Testimonials: Capturing candid interviews adds depth to promotional materials and helps build trust with potential clients by showcasing authentic user experiences.
- Training Videos: Filming training sessions in real-time allows organizations to create relevant content that is directly applicable to their teams, enhancing learning and retention.
- Live Streaming: Events often utilize on-site videography to enable live streaming, allowing remote audiences to participate in real-time, thus expanding reach and engagement.
Planning Your On-Site Videography Session
Pre-Production Strategies
A successful on-site videography project begins long before the cameras start rolling. Careful planning is essential to ensure that every aspect of the production is well thought out:
- Define Objectives: Clearly outline the goals of the video project. Understanding what the client wishes to achieve will guide all subsequent planning efforts.
- Create a Shot List: Collaborate with stakeholders to identify key moments and essential shots that must be captured during the event.
- Scout the Location: Visit the filming location prior to the event to evaluate lighting, sound, and potential logistical challenges.
Choosing the Right Equipment
The success of on-site videography heavily depends on the equipment used. Here are critical factors to consider when selecting gear:
- Cameras: Invest in a high-definition camera that performs well in various lighting conditions and allows for interchangeable lenses to adapt to different environments.
- Audio Equipment: Clear audio is crucial, so use lavalier microphones for interviews and shotgun mics for capturing ambient sound.
- Lighting Gear: Consider portable lighting options that can enhance visibility without being intrusive, particularly in darker venues.
Location Considerations for Effective Shoots
Before the shoot begins, assessing the location can greatly enhance the quality of the footage captured:
- Background: Ensure that the environment complements the narrative. Busy or distracting backgrounds can detract from the main subject.
- Noise Levels: Evaluate the audio environment to identify sources of potential background noise that may interfere with recording.
- Access Points: Plan for how the crew and equipment will enter and exit the location without disrupting the event.
Techniques to Enhance Your On-Site Videography
Lighting Techniques for Captivating Footage
Light can make or break a video. Here are strategies to effectively use lighting during on-site shoots:
- Natural Light: Whenever possible, take advantage of natural light sources. Position subjects near windows for soft, flattering illumination.
- Three-Point Lighting: Utilize a three-point lighting setup (key light, fill light, and backlight) to create dimension and depth in the footage.
- Reflectors: Use reflectors to bounce light onto the subjects, particularly in outdoor settings where shadows may obscure features.
Sound Quality: Capturing Clear Audio
Quality audio is as important as video. To capture clear sound during on-site shoots:
- Use Quality Microphones: Invest in quality microphones that suit the recording situation, including handheld mics for interviews and lapel mics for speakers.
- Monitor Sound Levels: Always have headphones on to monitor audio during recording, ensuring that levels remain consistent and clear.
- Control Noise: Minimize background noise by placing microphones strategically and using windshields for outdoor shoots.
Camera Angles for Maximum Engagement
Choosing the right camera angles can significantly enhance viewer engagement. Here are some tips:
- Varied Shots: Mixing wide shots, medium shots, and close-ups keeps the visual narrative dynamic and interesting.
- Subject Focus: Determine the main subject of the shot and adjust angles to highlight their significance to the audience.
- Movement: Incorporate movement such as pans or tilts to make the footage feel more alive and immersive.
Post-Production: Elevating Your Raw Footage
Editing Strategies for Professional Results
Post-production is a key phase that can transform raw footage into professional-quality videos. Here are some editing best practices:
- Storyboarding: Create a storyboard to visualize the final edit and ensure a coherent narrative flow.
- Color Grading: Apply color grading to enhance the mood and tone of the video, making it visually appealing and consistent.
- Transitions and Effects: Use transitions sparingly to maintain a professional look, while enhancing storytelling with subtle effects.
Additions That Enhance Storytelling
Incorporate elements that contribute to more engaging storytelling:
- Graphics and Text: Add captions and graphics to emphasize key points or provide additional information that enriches the viewer’s understanding.
- Sound Design: Use sound effects and music that resonate with the video’s theme and emotions to keep the audience engaged.
- Interviews: Integrate direct quotes or interview snippets that underscore important messages or themes within the video.
Tips for Effective Client Collaboration
Effective collaboration with clients during the post-production phase is essential for achieving desired outcomes:
- Regular Updates: Keep clients updated on progress and involve them in key decisions to ensure the final product meets their expectations.
- Receive Feedback: Actively solicit client feedback on draft edits, remaining open to adjustments that better reflect their vision.
- Set Clear Deadlines: Establish timelines for feedback and revision periods to keep the project on track.
Measuring Success in On-Site Videography
Key Performance Indicators to Track
To gauge the success of on-site videography projects, it’s important to monitor various key performance indicators (KPIs):
- View Count: Track how many times the video has been viewed across platforms to assess reach.
- Engagement Rate: Measure likes, shares, and comments to evaluate how well the content resonates with the audience.
- Conversion Metrics: Analyze metrics related to desired actions taken post-viewing, such as sign-ups or purchases, to determine effectiveness.
Client Feedback: Importance of Reviews
Collecting client feedback post-project is vital for continuous improvement:
- Satisfaction Surveys: Utilize surveys to gather data on client satisfaction, focusing on key aspects of the on-site videography process.
- Testimonial Collection: Encourage clients to provide testimonials that can be used for future marketing efforts.
- Review Metrics: Implement a review tracking system to analyze trends over time, identifying strengths and areas for improvement.
Continuous Improvement Techniques
Commit to continuous improvement by adopting the following practices:
- Post-Project Reviews: Conduct assessments of each project to identify what worked well and what could be improved in future projects.
- Professional Development: Invest in ongoing training for yourself and your team to stay updated on emerging trends and technologies in videography.
- Feedback Integration: Use feedback collected from past projects to refine processes and enhance the quality of future videography endeavors.

